
Gel Nail Designs: The Complete Guide to Finishes, Techniques, and Lasting Results
Gel nail designs depend on something most style guides skip entirely: understanding how gel actually cures and behaves, since this directly determines whether a design looks flawless or falls apart within days. Gel isn’t just “stronger polish.” It’s a genuinely different product category, cured under UV or LED light rather than air dried, and that curing process shapes nearly every decision that goes into a successful design.
This guide goes beyond a simple gallery of gel nail designs. It explains how different gel types, gel polish, builder gel, and Gel X, actually differ and which suits which goal, along with details most articles skip entirely like why layering order matters enormously with gel specifically, and why a design that works beautifully with one gel type can fail completely with another. Whether you’re new to gel manicures or refining a routine you already use, this is the deeper, more practical guide.
Why Gel Nail Designs Need Curing Process Awareness
Gel nail designs depend fundamentally on proper curing, the process of hardening gel under UV or LED light, in a way standard air dried polish simply doesn’t. Each layer, base coat, color, and topcoat, typically needs its own curing cycle, and skipping or rushing any single step compromises the entire manicure’s durability and finish.
This distinction matters because it directly affects which specific techniques actually succeed with gel versus which ones were really designed with standard polish in mind. Techniques involving multiple thin layers, like gradual color building or dimensional effects, require understanding exactly when to cure and when to continue working before curing locks a layer in place.
A helpful example: someone who applies gel color too thickly in a single coat, assuming more product means better coverage, often finds the gel doesn’t cure properly all the way through, resulting in a soft, dented, or bubbled finish. Applying thinner coats with full curing between each layer produces considerably better results among gel nail designs regardless of which specific style you’re attempting.
Because gel also requires proper removal through soaking rather than peeling, understanding this full product lifecycle, application, wear, and removal, matters for genuinely sustainable gel nail designs rather than just focusing on how the fresh manicure initially looks.
Click Here: https://nailsblooming.com/acrylic-nail-ideas/
Classic Solid Gel Polish

A single, well applied solid color remains one of the most foundational gel nail designs, and gel’s particular properties make this simple style look considerably more polished than the same color in standard polish. Gel’s naturally glossy, durable finish creates a smooth, even surface that standard polish often can’t replicate without multiple coats and careful drying time.
This particular style benefits enormously from gel’s resistance to the dents and smudges that can occur while standard polish air dries, since gel only hardens once cured under light, meaning your manicure stays perfectly smooth from application through to the curing step itself.
A helpful example: someone who struggles with smudging standard polish before it fully dries often finds gel solves this frustration directly, since the color remains workable until deliberately cured, removing the anxious waiting period traditional polish requires. This practical advantage is part of why solid color remains one of the most popular gel nail designs despite its simplicity.
Two thin coats, each fully cured before the next, typically produces the most even, chip resistant result, rather than attempting full opacity in a single thick application.
Gel-X Extensions With Nail Art

Gel-X, a soft gel extension system using pre-shaped tips adhered with gel rather than acrylic, offers a gentler route to added length among gel nail designs, combining gel’s flexibility with the structural benefit extensions provide without acrylic’s harder, more rigid finish.
This particular system tends to feel noticeably more lightweight and flexible than acrylic extensions, since the entire structure is built from gel rather than the harder acrylic powder and liquid combination, making it a popular choice for those wanting length without acrylic’s characteristic stiffness.
A helpful example: someone who found acrylic extensions felt heavy or inflexible might find Gel-X offers a genuinely different, lighter sensation while still providing meaningful added length and durability. This distinction matters for anyone choosing between extension systems when planning gel nail designs involving significant length.
Because Gel-X removal involves soaking rather than the filing and prying sometimes associated with acrylic, this system also tends to be gentler on the natural nail during the removal process specifically.
Builder Gel Overlay With Chrome Finish
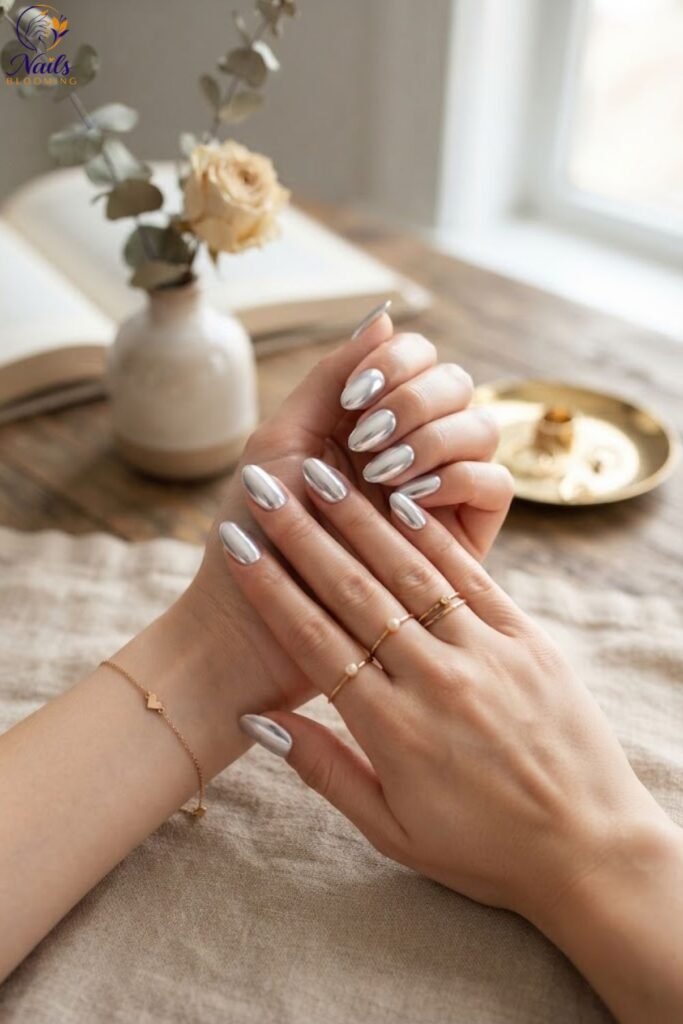
Builder gel, a thicker, more structural gel formula used primarily for strengthening and subtle length extension on the natural nail, pairs particularly well with chrome finishes among gel nail designs, since the material’s smooth, buildable surface provides an ideal foundation for chrome powder’s reflective application.
This particular combination works because builder gel’s slightly tacky, uncured surface state, the specific window before full curing, is exactly what chrome powder needs to adhere properly, making this gel type especially well suited to this particular finish technique.
A helpful example: someone attempting chrome over a fully cured, hardened surface often finds the powder simply won’t stick properly, while timing the chrome application to builder gel’s specific tacky curing stage produces the smooth, reflective finish this particular gel nail design depends on. Understanding this timing window matters considerably for anyone attempting chrome finishes specifically.
This combination also benefits from builder gel’s natural strength, providing genuine reinforcement for the natural nail alongside the chrome’s striking visual effect.
Soft Gel French With Ombre Blending

Updating the classic French manicure with a soft, blended ombre transition rather than a sharp, defined tip line showcases one of gel’s particular advantages among gel nail designs, since gel’s workable, uncured state allows for genuinely smooth blending before the design locks into place.
This particular technique benefits from gel polish’s extended working time compared to standard polish, which begins drying and hardening the moment it’s exposed to air, giving technicians considerably more time to blend and perfect a gradual transition before curing locks the design in permanently.
A helpful example: someone attempting a soft ombre French with standard polish often finds the color begins setting before the blend is fully smooth, while the same technique with gel allows unhurried blending since the product remains workable until deliberately cured under light. This extended working window is a genuine technical advantage specific to gel nail designs using blending techniques.
Finishing with a high-shine gel topcoat enhances the gradual transition’s soft, dimensional quality, since gel’s naturally glossy finish catches light particularly well.
Painted Fine Art on Gel Base

Detailed, hand-painted nail art, delicate flowers, fine linework, or small illustrations, benefits considerably from a gel base among gel nail designs, since gel’s smooth, consistent surface provides better control for fine detail work than the sometimes more variable texture of a natural nail alone.
This particular approach also allows artists to cure the base color fully before beginning detail work, creating a stable, set foundation to paint on top of, rather than working on a surface that’s still potentially shifting or settling the way wet standard polish would be.
A helpful example: a nail artist working on intricate, detailed designs often prefers a fully cured gel base specifically because it provides a stable, non-shifting canvas, allowing precise brushwork that wouldn’t be possible on a surface still actively drying. This technical advantage is part of why detailed hand-painted gel nail designs tend to look cleaner than similarly detailed work attempted with standard polish.
Sealing the finished artwork beneath a clear gel topcoat protects the detail work while adding the glossy finish gel is generally chosen for.
Milky “Your Nails But Better” Gel
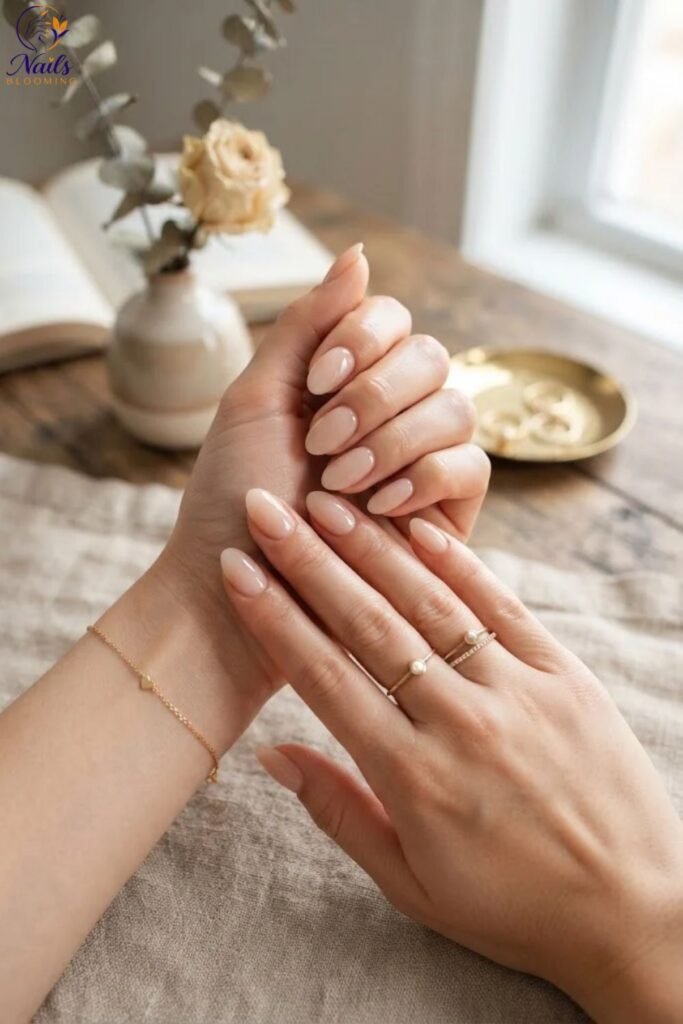
Soft, sheer milky gel polish creates the popular “your nails but better” effect among gel nail designs, offering a barely-there, elevated natural look that gel’s durability makes considerably more practical to maintain than attempting the same sheer effect with standard polish.
This particular style benefits from gel’s resistance to the quick chipping sheer standard polish often experiences, since the thin, translucent nature of sheer colors typically makes standard polish versions especially prone to visible wear within just a day or two.
A helpful example: someone who loves the natural, barely-there look but finds sheer standard polish chips almost immediately often finds the gel version considerably more practical, since gel’s inherent durability extends this subtle style’s wearable lifespan significantly longer than standard polish manages. This durability advantage makes milky gel one of the more popular practical choices among gel nail designs specifically.
Building the sheer color gradually with two to three thin, fully cured layers achieves the ideal soft opacity without looking streaky or uneven.
Encapsulated Glitter Within Gel Layers

Sealing glitter particles between layers of clear gel creates dimensional sparkle that stays genuinely protected, offering one of the more durable glitter techniques among gel nail designs compared to glitter applied as a standalone topcoat that tends to wear and dull relatively quickly.
This technique relies specifically on gel’s layered building process, curing a base layer, placing glitter, then sealing it beneath additional clear gel before final curing, a sequence that keeps the sparkle embedded within the structure rather than sitting vulnerable on the exposed surface.
A helpful example: someone who finds standalone glitter topcoat looks dull or patchy within a week often discovers that encapsulated glitter within gel maintains its full brilliance considerably longer, since the sealed layers protect the particles from the surface wear standalone glitter polish experiences directly. This durability makes encapsulation worth considering among gel nail designs for anyone specifically wanting long-lasting sparkle.
Ensuring each layer cures fully before adding the next prevents the glitter from shifting or clumping unevenly within the final design.
Textured Velvet or Sugar Finish Gel

Specialty textured gel topcoats create a soft, velvety or sugar-like surface finish among gel nail designs, adding tactile dimension without requiring any additional painted detail, relying instead on the finish itself to provide visual and physical interest.
This particular effect tends to work especially well over gel specifically, since the material’s smooth, even base provides consistent texture distribution, whereas a more uneven natural nail surface underneath might cause the textured topcoat to display unevenly across the nail.
A helpful example: someone trying a textured topcoat for the first time might apply it too thickly, expecting more texture with more product, when a thin, even layer typically produces the most authentic velvet-like effect, while excess product creates clumpy, uneven texture instead. Understanding this application nuance helps achieve the genuinely soft, tactile quality this particular style among gel nail designs depends on.
This finish pairs especially well with deep, richly saturated gel colors, since the texture enhances these darker tones’ sense of depth and richness.
Everyday Gel Polish at Short to Medium Length
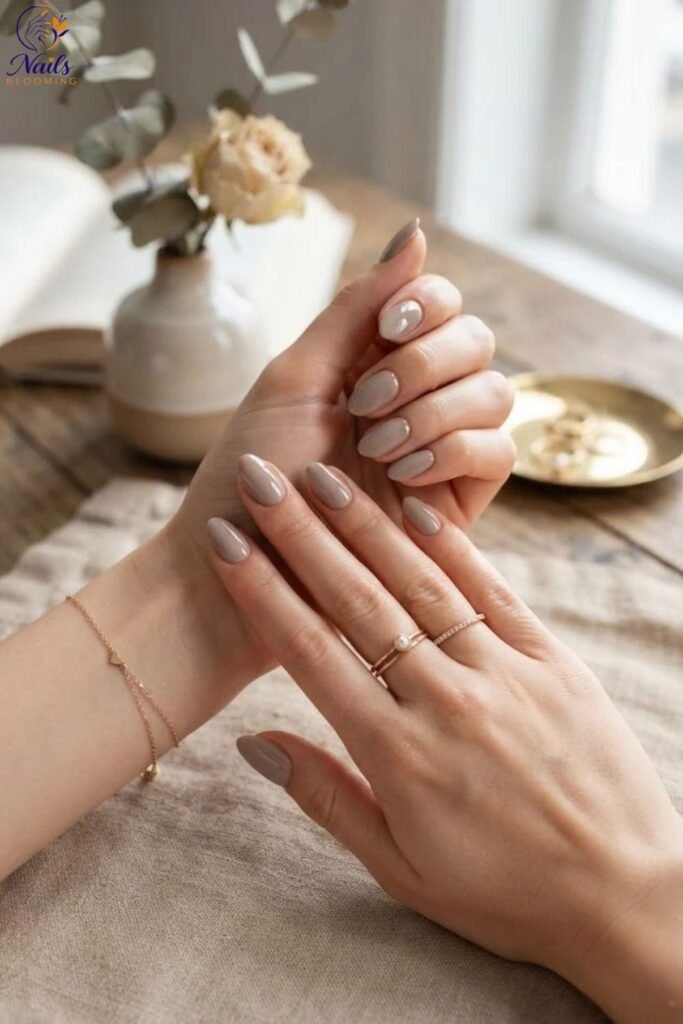
Gel polish applied directly to short or medium-length natural nails, without any added extension, represents one of the most practical, everyday gel nail designs for those wanting durability and shine without committing to added length or the maintenance extensions require.
This approach benefits from gel’s particular suitability for shorter nails specifically, since the material’s smooth, glossy finish photographs and wears beautifully regardless of length, meaning you get gel’s full durability and shine advantages without needing significant nail length to showcase it.
A helpful example: someone who works extensively with their hands and prefers shorter, practical nails doesn’t need to sacrifice gel’s benefits simply because they’re not pursuing extensions, since gel polish applied directly to natural, shorter nails delivers the same chip resistance and shine as it would on longer nails. This accessibility makes everyday gel polish one of the more universally practical gel nail designs available.
Regular maintenance, generally every 2–3 weeks as new growth becomes visible, keeps this practical, everyday approach looking consistently fresh and polished.
Comparing Gel Types for Your Goals
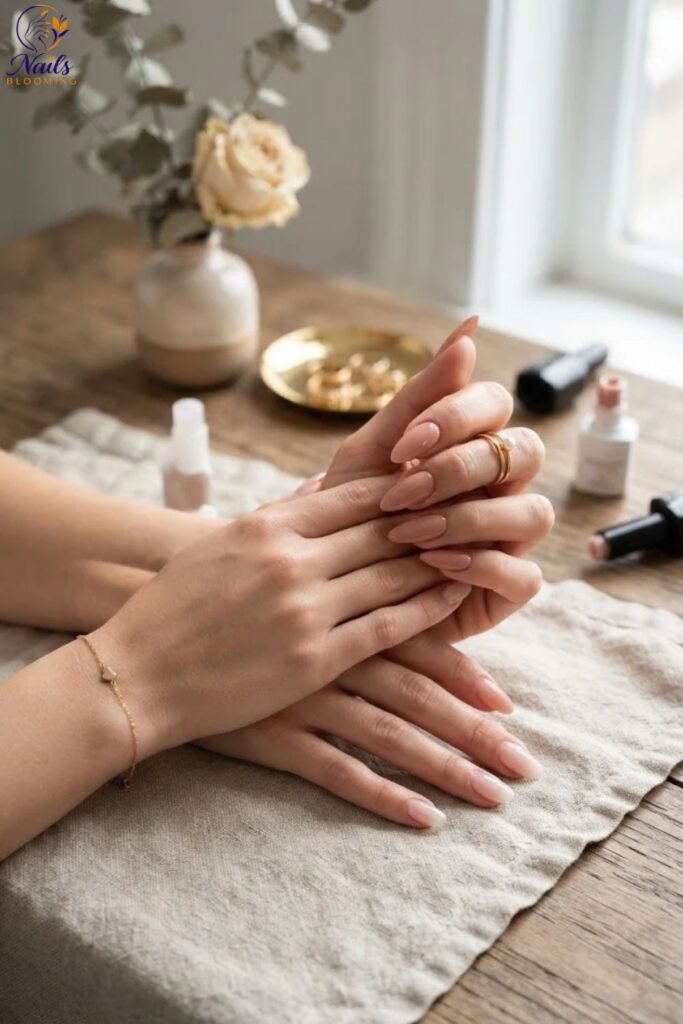
Understanding the genuine differences between gel polish, builder gel, and Gel-X helps you choose the right foundation for whichever gel nail designs you’re drawn to, since these are meaningfully different products serving different purposes rather than interchangeable versions of the same thing.
Gel polish functions essentially as a more durable color coat applied over the natural nail, adding minimal to no structural reinforcement or length. Builder gel adds genuine strength and can create subtle length and structure directly on the natural nail. Gel-X uses pre-shaped tips to create significant length quickly, with gel rather than acrylic forming the structural bond.
A helpful example: someone wanting simply more durable color on their existing nail length should generally choose gel polish, while someone wanting genuine reinforcement against breakage might choose builder gel, and someone wanting significant added length would typically choose Gel-X. Understanding which specific goal you’re pursuing helps you request the right product category among gel nail designs rather than assuming they’re all functionally identical.
Discussing your specific goals, durability, strength, or length, with your technician before the appointment ensures you receive the gel type genuinely suited to what you’re actually trying to achieve.
Common Mistakes to Avoid With Gel Nail Designs
One of the most frequent mistakes is applying gel too thickly in a single layer, assuming more product means better coverage, when in practice this often results in incomplete curing and a soft, dented finish. Building color gradually with thin, fully cured layers produces considerably better results.
Another common error involves skipping proper curing time for any individual layer, rushing through the process and compromising the entire manicure’s durability as a result. Following recommended curing times specifically for your particular LED or UV lamp helps avoid this common issue.
Attempting to peel off gel rather than properly soaking it off is another frequently repeated mistake, since this practice frequently removes layers of the natural nail along with the gel, causing genuine damage that proper removal avoids entirely.
Finally, choosing a technique like chrome or encapsulation without understanding its specific timing and layering requirements often leads to disappointing results among more advanced gel nail designs, making it worth discussing technique-specific requirements with your technician beforehand.
The Future of Gel Nail Designs
Gel nail designs continue to evolve alongside genuine advances in formulation technology, with more brands developing gentler, less damaging gel systems that provide the same durability benefits while reducing the natural nail stress sometimes associated with traditional formulations and their removal process.
There’s also growing emphasis on faster curing formulas and more efficient LED lamp technology, reducing the time required for multi layer techniques without compromising the thorough curing proper gel application depends on.
Product technology is advancing alongside this trend as well, with more brands developing specialized gel formulas specifically designed for techniques like chrome, encapsulation, and textured finishes, making these more advanced gel nail designs increasingly accessible to a wider range of skill levels.
Looking ahead, personalized digital consultation tools, including apps that help identify which specific gel type and technique combination suits a person’s goals and nail condition, are beginning to help people choose gel nail designs with more confidence before ever sitting down for an appointment.
Conclusion
Gel nail designs offer genuine durability and shine once you understand how curing, layering, and gel type all work together. From classic solid color to encapsulated glitter, there’s an option here suited to nearly every style preference and practical need. The key is understanding which gel type and technique actually fits your specific goal. Ready to try one of these gel nail designs Bring this guide to your next appointment and start the conversation with your nail technician.

Alex Parker is a nail and beauty enthusiast with 5 years of experience in nail art and beauty trends. Through NailsBlooming.com, Alex shares fresh nail designs, trendy colors, seasonal styles, and simple manicure inspiration. The goal is to make finding beautiful and creative nail ideas easy for everyone.


